New to needle felting and eager to make something wearable? You’ve come to the right place! This needle felting earrings tutorial is designed for absolute beginners. We’ll guide you through the easiest method to create beautiful, lightweight wool earrings. The process is relaxing, meditative, and incredibly rewarding—all you need are three basic steps. Let’s dive into your first needle felting project!
What You’ll Need for This Tutorial
Before we start this simple needle felting earrings tutorial, let’s gather the essentials. You don’t need much to begin:
Wool: A small amount of wool roving (Merino wool is soft and ideal for earrings).
Tools: Felting needles (a coarse one for shaping and a fine one for refining) and a foam working pad.
Findings: Earring hooks and jump rings (or headpins). For decoration, you can prepare small beads.
Your 3-Step Needle Felting Earrings Tutorial
Step 1: Form the Basic Shape
Take a generous pinch of wool and roll it tightly into a compact ball or pad. Place it on your foam pad. Using your coarse felting needle, begin poking it firmly and evenly.
For a round bead: Constantly rotate the wool as you poke to form a sphere.
For a flat shape: Flatten the wool and poke to define an outline, like a leaf or a teardrop.
Don’t aim for perfection. Feel the wool tighten and condense. Once it holds its shape firmly, you’ve mastered the first core technique in this beginner needle felting tutorial.
Step 2: Refine and Smooth the Surface
Switch to your fine felting needle. This step transforms your piece from rough to polished.
Gently poke the entire surface to even out any bumps or deep needle marks.
For a super smooth finish, wrap a final, whisper-thin layer of wool around the piece and carefully felt it on with the fine needle.
This refinement process is key in any needle felting jewelry tutorial to achieve a professional, wearable look. Keep refining until you love the feel and shape.
Step 3: Add Details and Assemble
This is where your creativity shines! Follow this final part of our earring making tutorial:
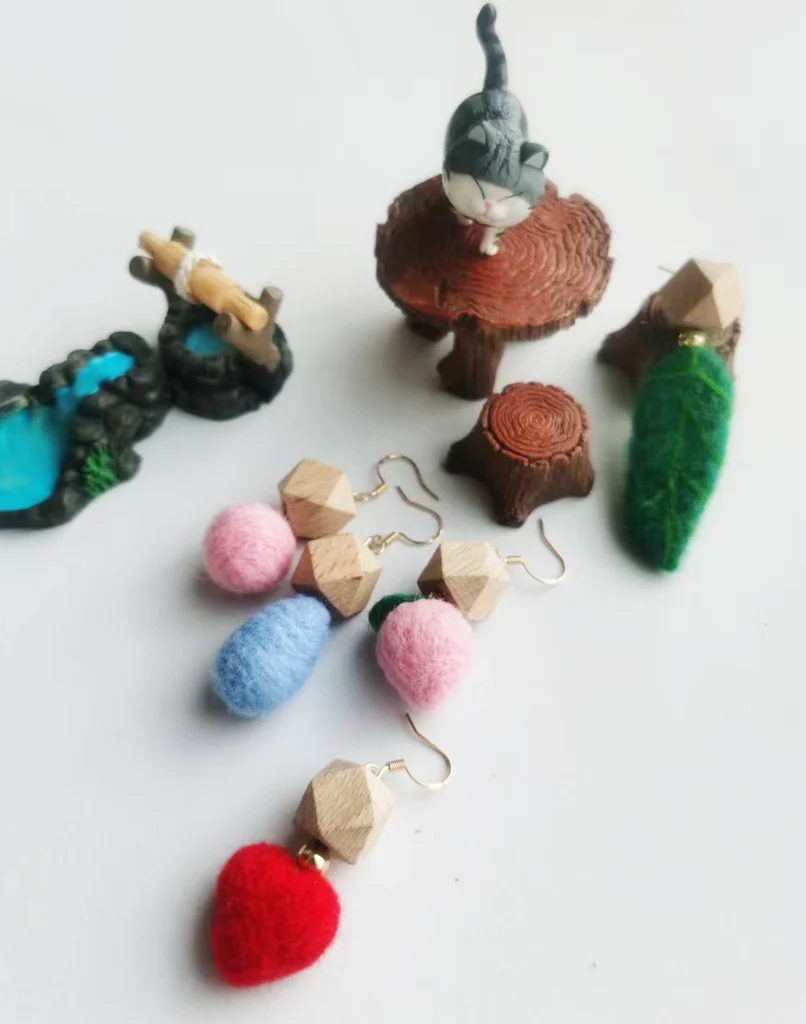
Embellish: Add small accents with contrasting wool—think veins on a leaf or dots on a berry.
Assemble: Use jewelry pliers to attach a headpin or jump ring to your felted piece. Connect it to the earring hook, adding any beads for extra sparkle before closing the loop.
Congratulations! You’ve just completed your first pair of handmade earrings using this easy needle felting earrings tutorial.
Start Your Creative Journey with Confidence on DIYFELTING
We understand that starting a new craft can feel overwhelming. That’s why at DIYFELTING, we’re committed to making your first experience a guaranteed success. Our Beginner’s Needle Felting Kit is thoughtfully curated with everything from our tutorial and more:
Extra Wool for Practice: We include ample extra wool roving so you can experiment freely without stress.
Complete Component Set: Get all the necessary findings, plus decorative beads to explore the designs in this tutorial and beyond.
Essential Safety Gear: We even include a pair of leather finger guards for comfortable and safe crafting right from the start.
If you’d like to check out more earring designs, you can click easy needle felting earring kits and fruits &animals needle felting kit .
We believe the best way to learn needle felting is by creating something you love. Your leftover materials are perfect for practicing new shapes and colors. We can’t wait to see what you make!
Ready for your next project? Follow DIYFELTING for more inspiring and easy-to-follow tutorials. Happy Felting!
