Have you ever wanted to create your own charming, handmade decorations? Needle felting is a relaxing and rewarding craft, and this felt bird tutorial for beginners is the perfect place to start. This guide will walk you through every step of creating a delightful felted bird, breaking down the process into simple, manageable stages. Let’s transform soft wool into a beautiful work of art!
Why You’ll Love This Felt Bird Tutorial for Beginners
A felt bird is an ideal first project for several reasons:
Fundamental Shapes: It uses basic balls and ovals, helping you master the core skills of needle felting.
Quick and Satisfying: You can finish your felted bird within 1 to 2 hours, offering a great sense of accomplishment.
Forgiving and Creative: The rustic, handmade look is part of its charm, so perfection is not the goal!
What You Need to Get Started
While you can source materials individually, a felt bird kit is the most convenient option for beginners. A good kit, like our Complete Felt Bird Starter Kit, provides everything in one place:
Assorted Wool Roving: Pre-sorted colors for the body, head, and details.
Felting Needles: Including coarse (for fast shaping) and fine (for smooth details) needles.
Felting Foam Pad: A safe surface to work on.
Essential Extras: Finger guards, eyes, and a clear instruction guide.
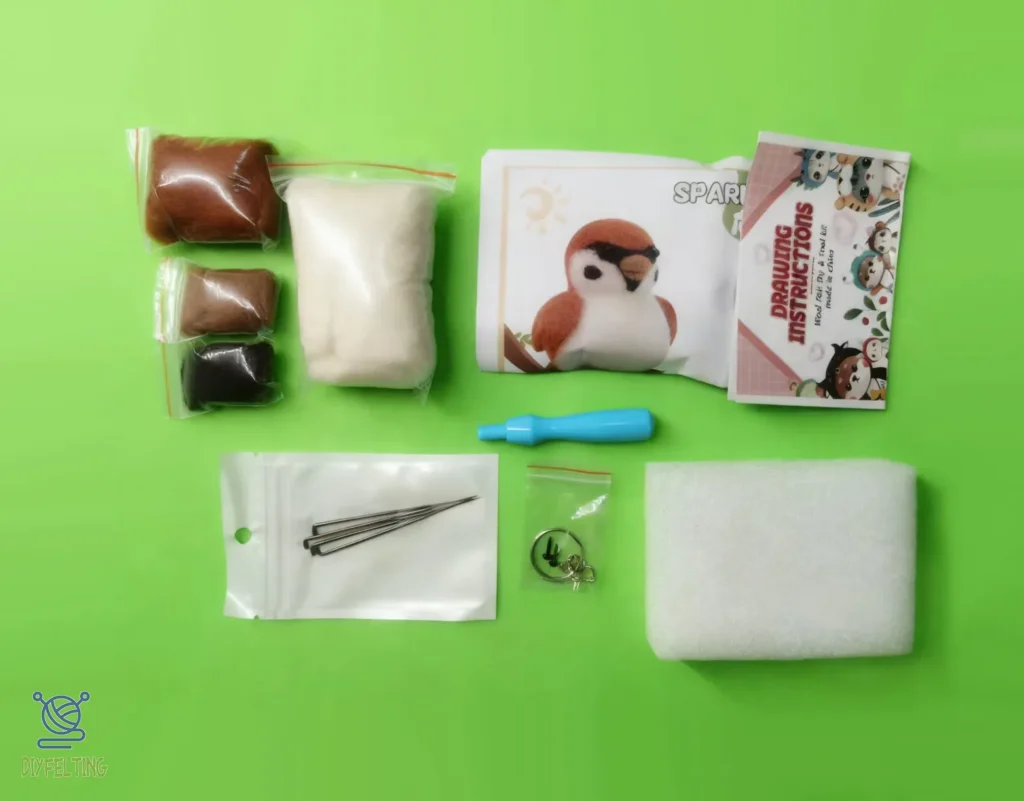
Want the same kit,Click the picture.
Your Step-by-Step Felt Bird Tutorial
Let’s dive into the hands-on process. Work on your foam pad and use finger guards for safety.
Step 1: Form the Body and Head
The Body: Take a generous portion of your main color wool . Take out about half of the wool and tightly roll it into a ball. Use your thick needle to repeatedly stab and compact it until it forms a slightly flattened sphere. This will be the bird’s body.
The Head: Take a smaller amount of the same wool. Repeat the process to create a smaller, round ball for the head.
Pro Tip: Rotate the wool frequently as you poke to ensure an even shape and prevent it from sticking to the pad.
Step 2: Connect the Head to the Body
This is a crucial step for a sturdy bird.
Place the small ball on top of the large ball and use a thick needle to pierce deeply several times to bond them together.
Pull a thin wisp of wool and wrap it around the neck joint.
Using your fine needle, carefully felt this wrapped wool into place. Poke where the wrap meets both the head and the body to seamlessly fuse the two parts together.
Step 3: Build the Body and Define the Face
Smooth the Back: Add a thin layer of brown wool to the top of the bird’s head and its back, then pierce repeatedly to create a smooth, uniform surface—like putting a hooded coat on the little bird.
Create the Face: Take a tiny amount of black wool. Gently needle it onto the front of the head to form a face or a classic “mask” shape. The fine needle allows for precise placement.
Step 4: Craft the Wings and Tail
Making the Wings:
Take two equal, small pieces of wool.
Shape each into a flat, teardrop-like pad.
Position them on the sides of the body. Attach the wider end firmly with your needle, leaving the tip slightly free for a natural wing look.
Creating the Tail:
For a full-colored tail, felt a small, flat triangle from your main color and attach it.
Smart Beginner Tip: If you’re running low on colored wool, create a core shape from white wool and then wrap it with a thin layer of your main color. This saves materials and works perfectly!
Step 5: Shape the Feet
Take two very small pieces of wool . Roll them into short, thin cylinders for the legs.
Attach these to the bottom of the body.
Take two small tufts of wool and shape them into ovals. Press two toe prints on the front side to create the bird’s claws, then attach them underneath the body. Finally, let the little bird stand on the desktop.
Step 6: The Final Details
Add the Eyes: Pierce deeply a few times at the eye positions, then insert the bird’s eyes—now a complete little bird is finished.
Refine and Smooth: Go over your bird with your finest needle. Poke away any loose fibers to create a clean, polished finish.
Add Accessories:Your kit includes a beak or a keychain attachment, add it now to complete your project!
Helpful Tips and Troubleshooting
Problem: The wool isn’t getting firm.
Solution: Be patient and poke more! Ensure you’re using a straight up-and-down motion.Problem: My bird is stuck to the pad.
Solution: Gently rotate your project frequently. If stuck, carefully slide a needle underneath to loosen it.Problem: The shape is lumpy.
Solution: If there are lumps on the surface, it means you didn’t adjust the position and direction in time while piercing, resulting in unevenly felted wool. To avoid this, add a small amount of wool each time. You can use a thick needle to flatten the lumps, then cover the surface with a thin layer of wool and pierce evenly with a fine needle—this will make the lumps invisible. Alternatively, add wool around the lumpy area and use a fine needle to pierce until the entire surface is smooth.
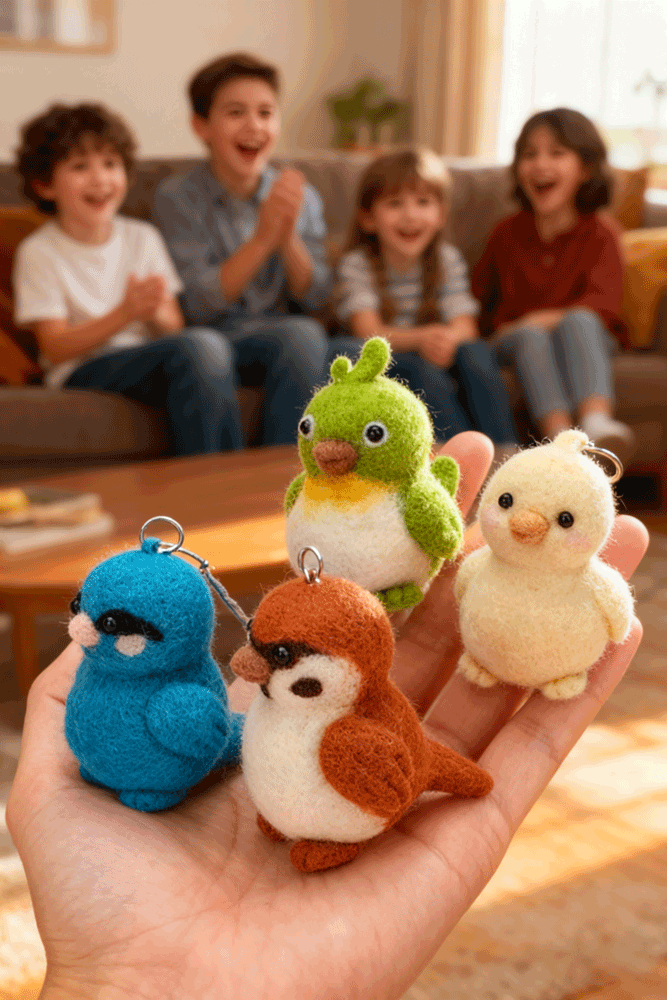
Conclusion: Your First Felted Bird is Complete!
Congratulations! You have successfully followed this felt bird tutorial for beginners and created a beautiful, handmade felted bird. You’ve learned the essential skills of shaping, joining, and detailing—skills you can use to make a whole aviary of unique creations.
Ready for your next project? The best way to start is with a kit that has everything you need. Click here to explore our beginner-friendly Felt Bird Craft Kit and begin your needle felting journey today!
We love seeing your creations! Share your finished felt bird on social media and tag us. Happy felting!
